Using Background triggers and IFTTT webhooks
- Step 1: Create a new IFTTT Applet
- Step 2: Choose the Webhook trigger
- Step 3: Setting up the trigger
- Step 4: Choose an event name for your IFTTT webhook
- Step 5: Choose the action
- Step 6: Choose the Google Sheet action
- Step 7: Choose how Google Sheet will handle the new information
- Step 8: Finish setting up the action
- Step 9: Finish the IFTTT Applet creation
- Step 10: Get the webhook URL
- Step 11: Create a new background trigger
- Step 12: Setting up the background trigger
- Step 13: Set up the action
- Step 14: Set up the location
- Step 15: Wrapping up!
- Want more?
Step 1: Create a new IFTTT Applet
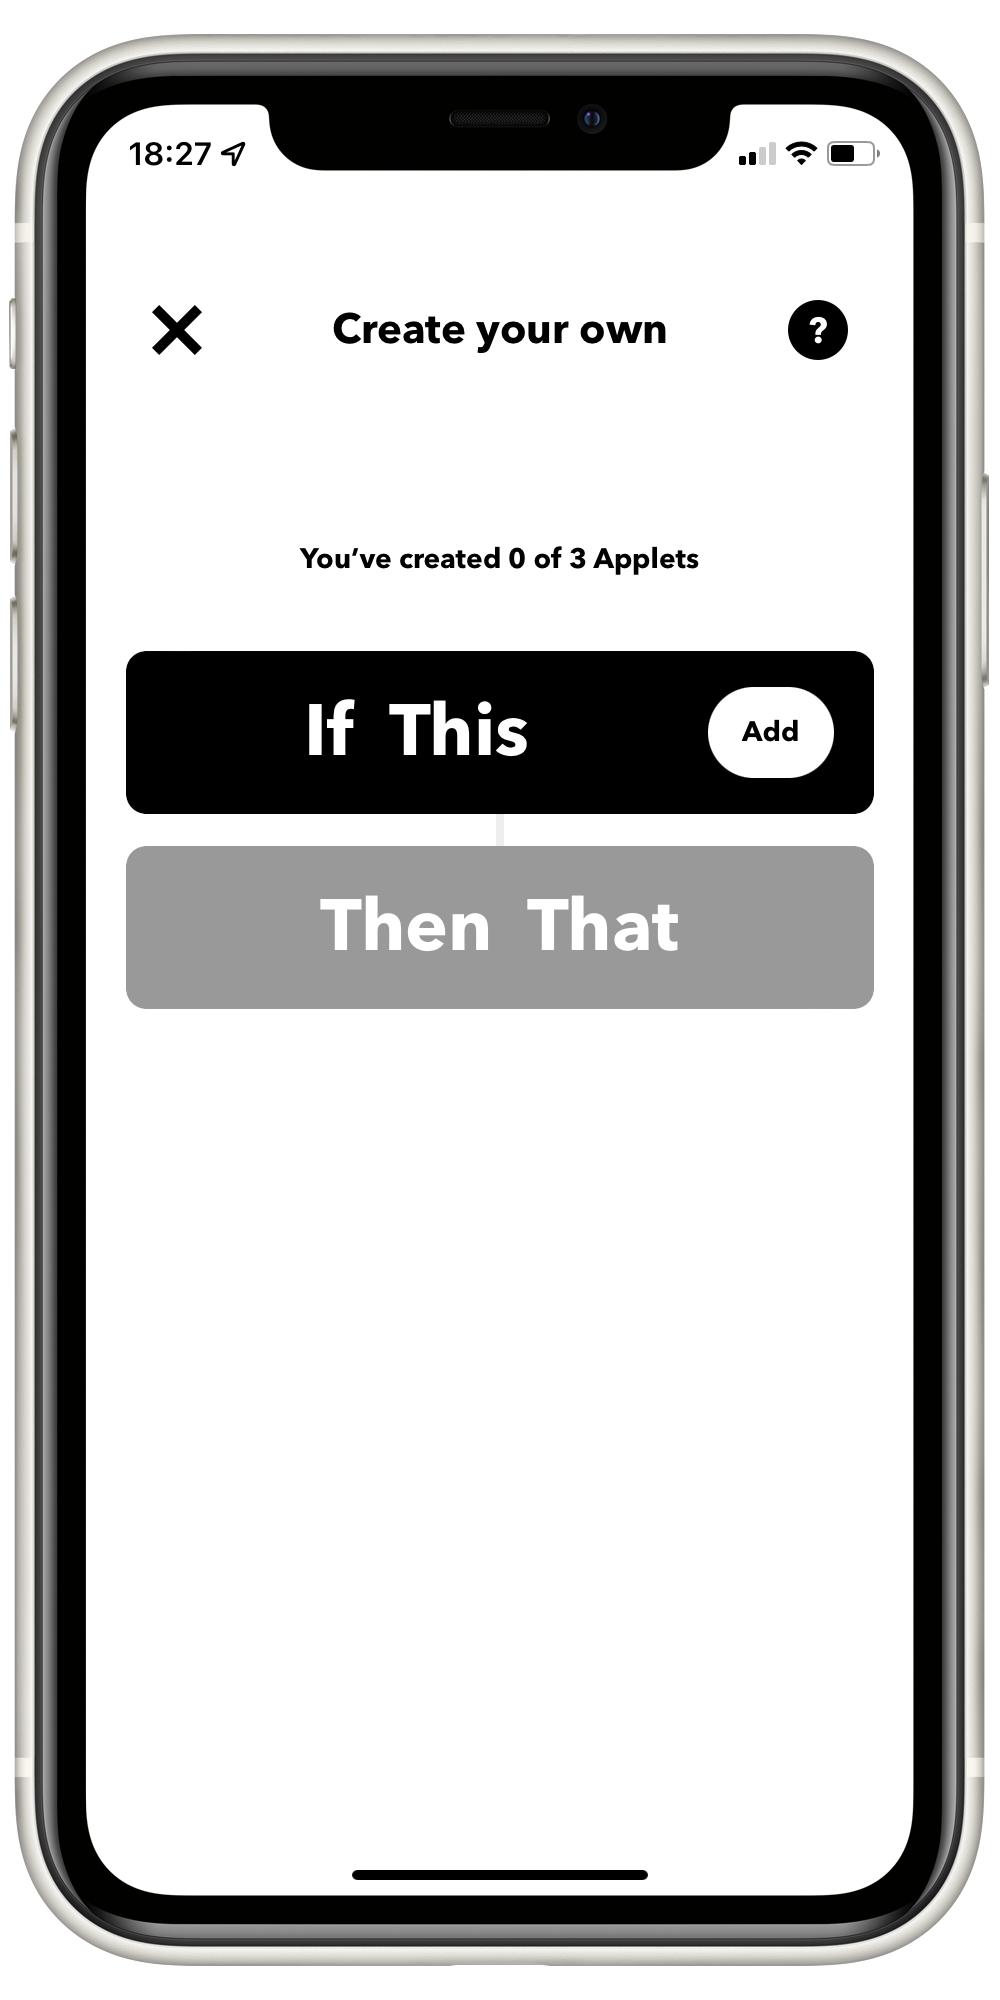
Using the IFTTT app or website, create a new Applet.
Our first step will be to set up the trigger, so tap on the Add button.
Step 2: Choose the Webhook trigger
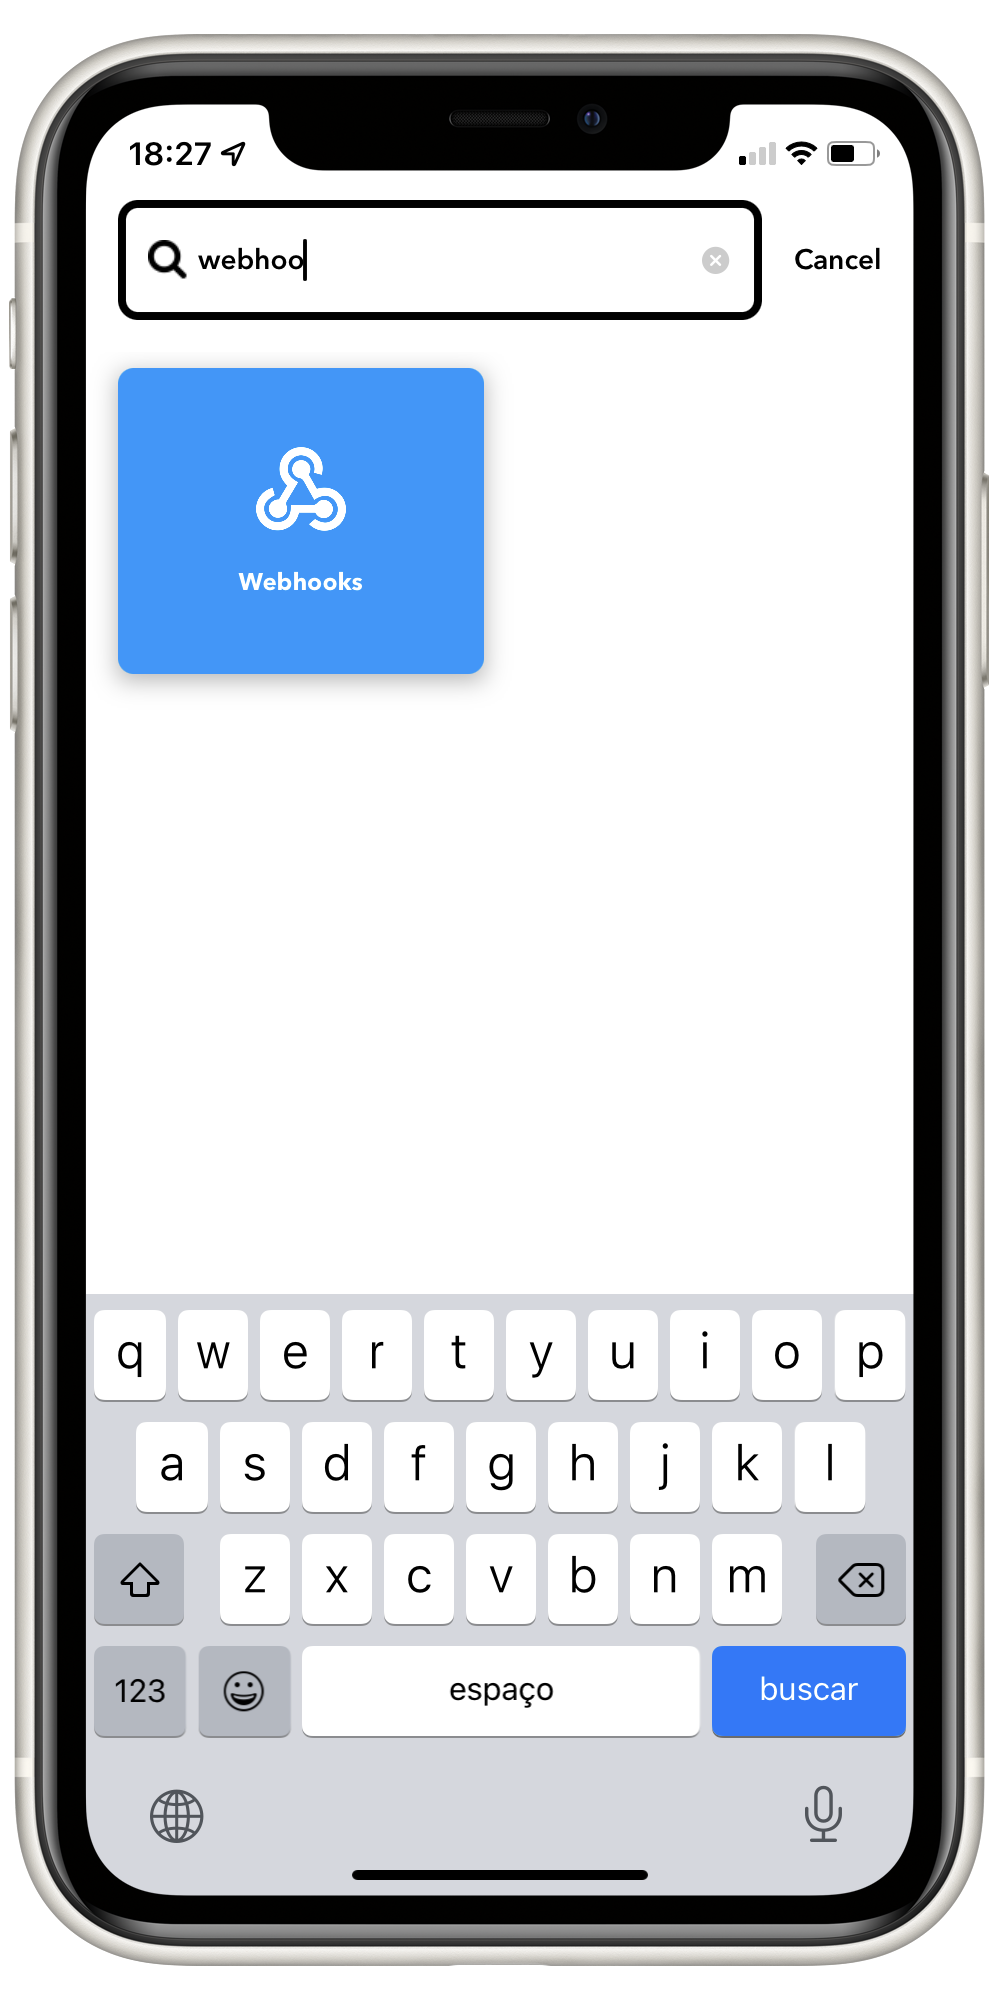
Search for Webhook and tap on the corresponding result once it appears.
IFTTT's webhook trigger will provide us with a URL we can call to activate the Applet and run the action we'll configure later.
Since Pushcut's Background Triggers are able to call URLs without any user interaction, webhooks from our favorite integration services are a very powerful tool in our automation belt!
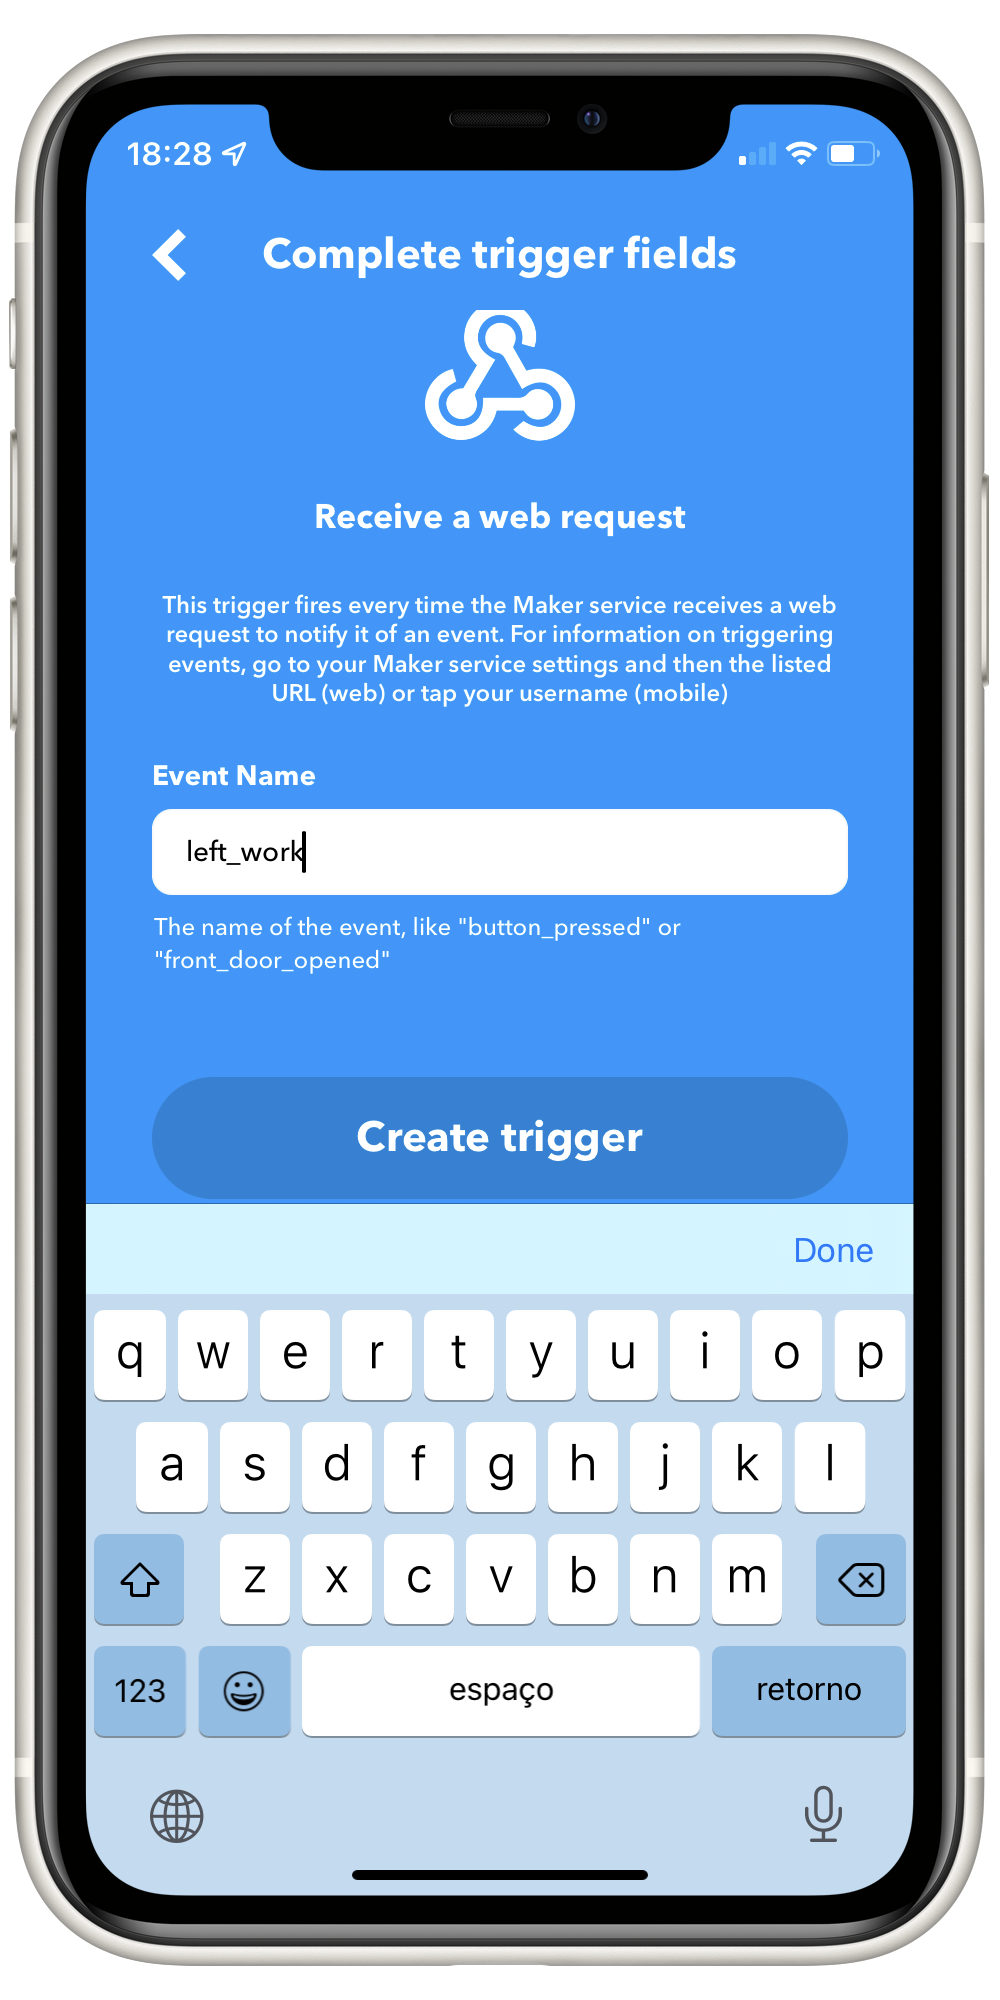
Step 3: Setting up the trigger
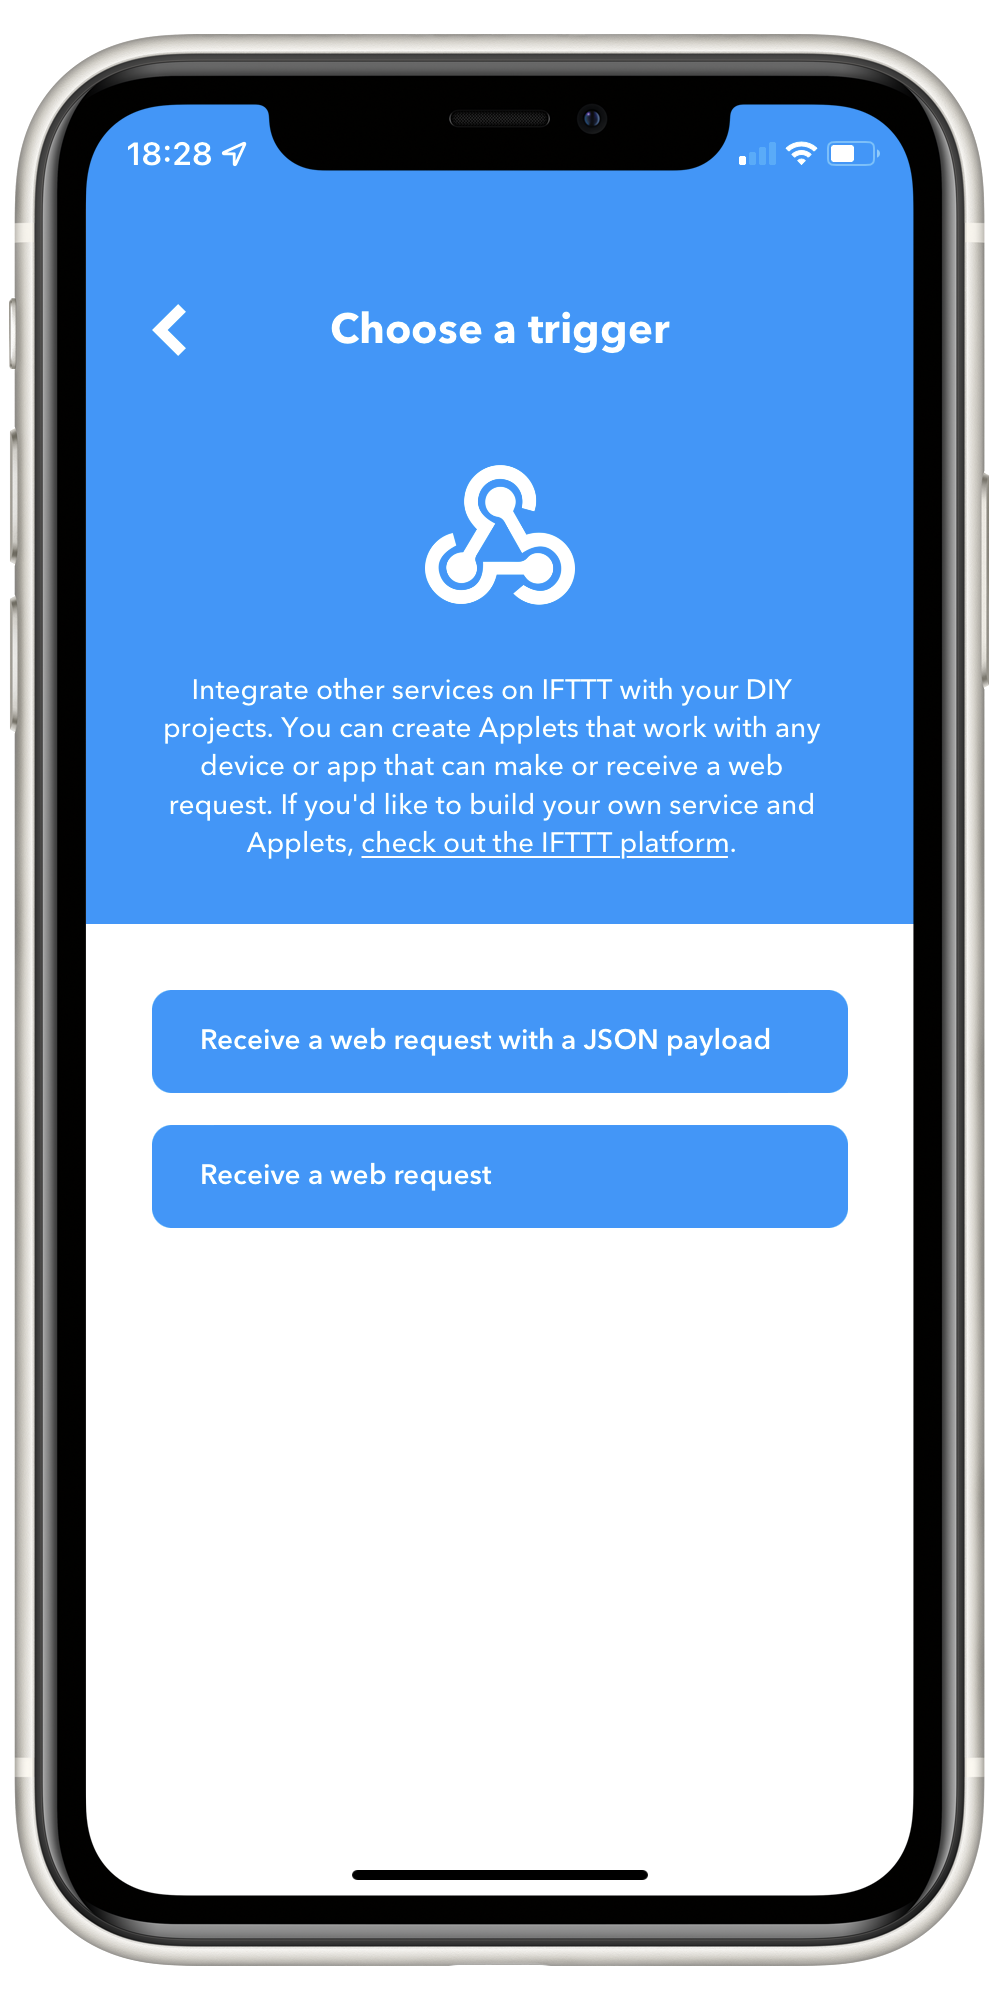
Choose Receive a web request.
Since for this example we're not going to need any additional data passed to our action, this is the best option.
Step 4: Choose an event name for your IFTTT webhook
The event name is like an ID for your IFTTT webhook. It's the reference you'll provide to the service so that it knows which Applet to run.
In this case, we'll start by creating the event that should be triggered when leaving the workplace, so we'll call it left_work.
You can learn more about IFTTT webhooks on their FAQ.
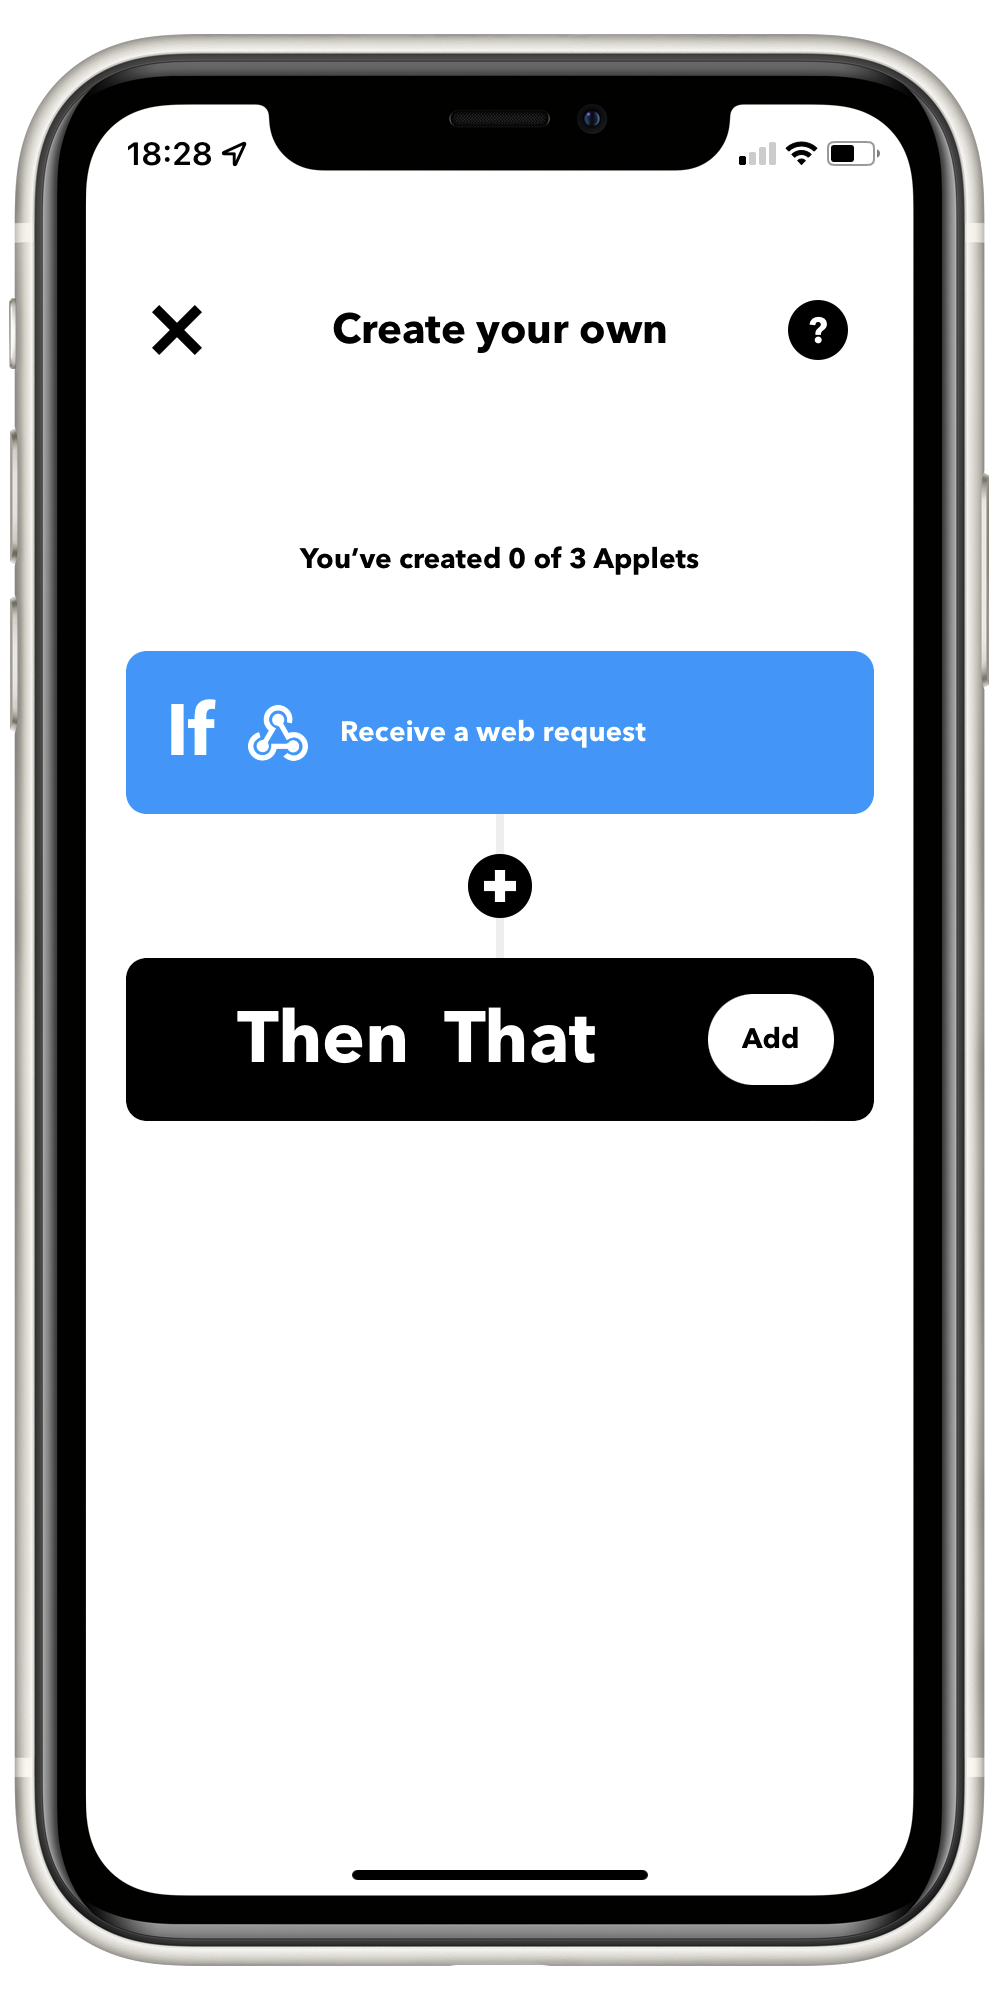
Step 5: Choose the action
Now that the trigger has been set up, it's time to work on the action. Tap the Add button.
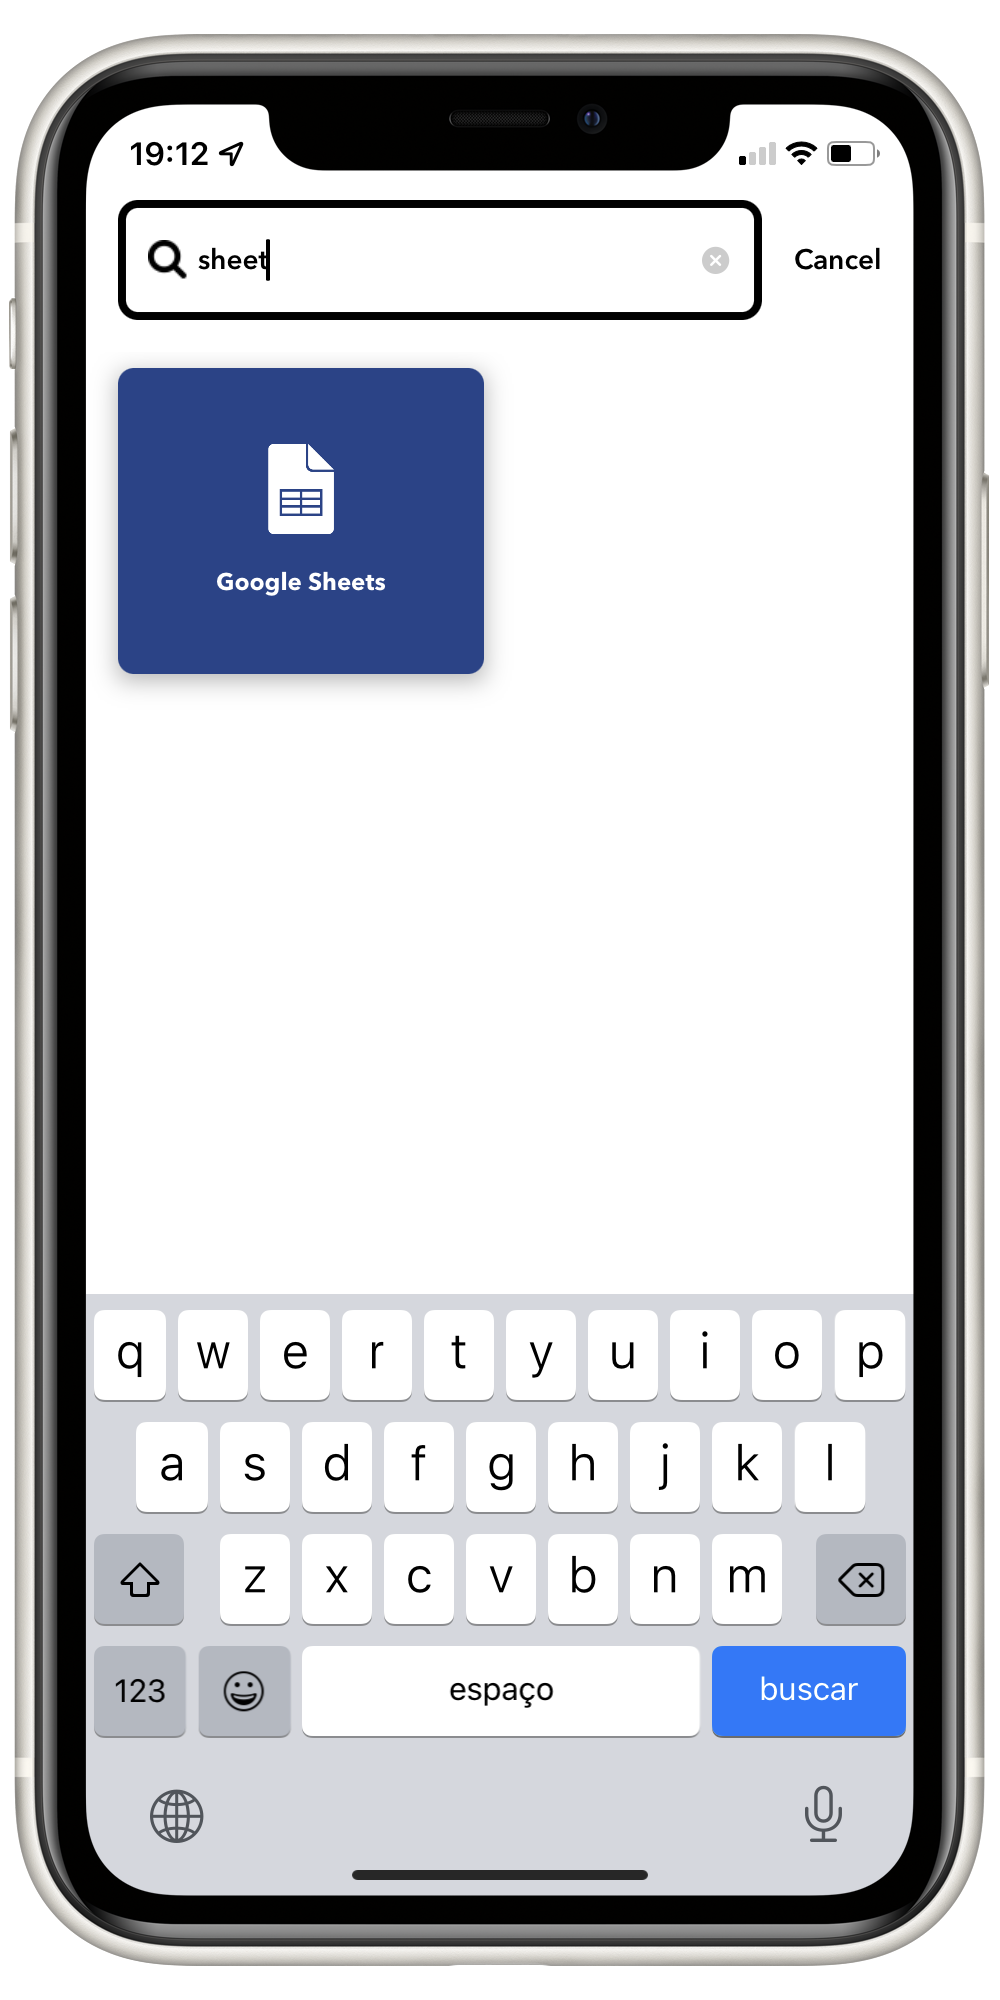
Step 6: Choose the Google Sheet action
We'll use a good old spreadsheet to log the work hours, so search for Google Sheets and tap on the corresponding result once it appears.
IFTTT provides many other actions you can explore, so you could, for example, use different services for this purpose, such as Airtable.
Step 7: Choose how Google Sheet will handle the new information
Since we'd like to keep a history of all our work hours, choose Add row to spreadsheet.

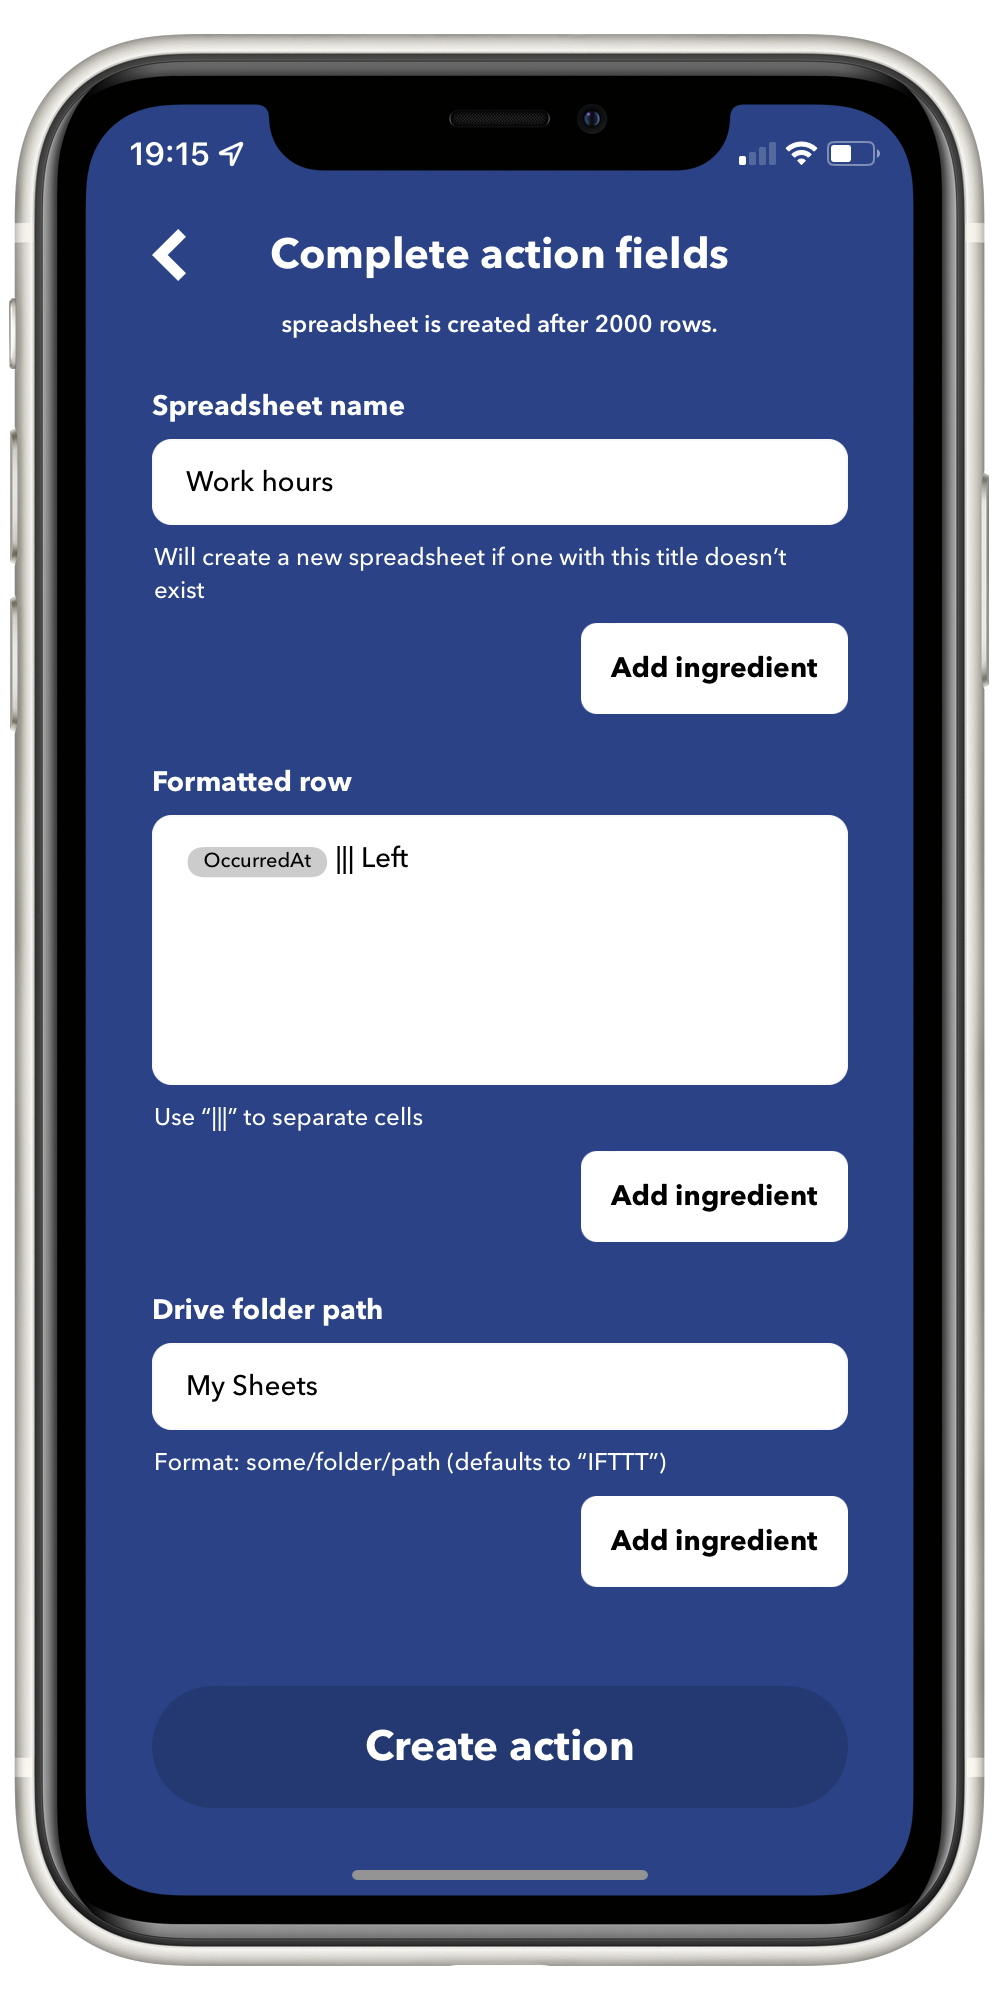
Step 8: Finish setting up the action
We now have to tell IFTTT more details about the spreadsheet update.
Choose the name of the spreadsheet where you'd like to keep the records. In our example, we used the Work hours name.
| In the second field, we must tell IFTTT how we'd like to organize the information on the row we're adding. The |
Finally, the last field is just the folder where the spreadsheet is stored on Google Sheets. If you leave it blank, a folder called IFTTT will be created and your sheet stored in it.
Once you're finished, tap on Create Action.
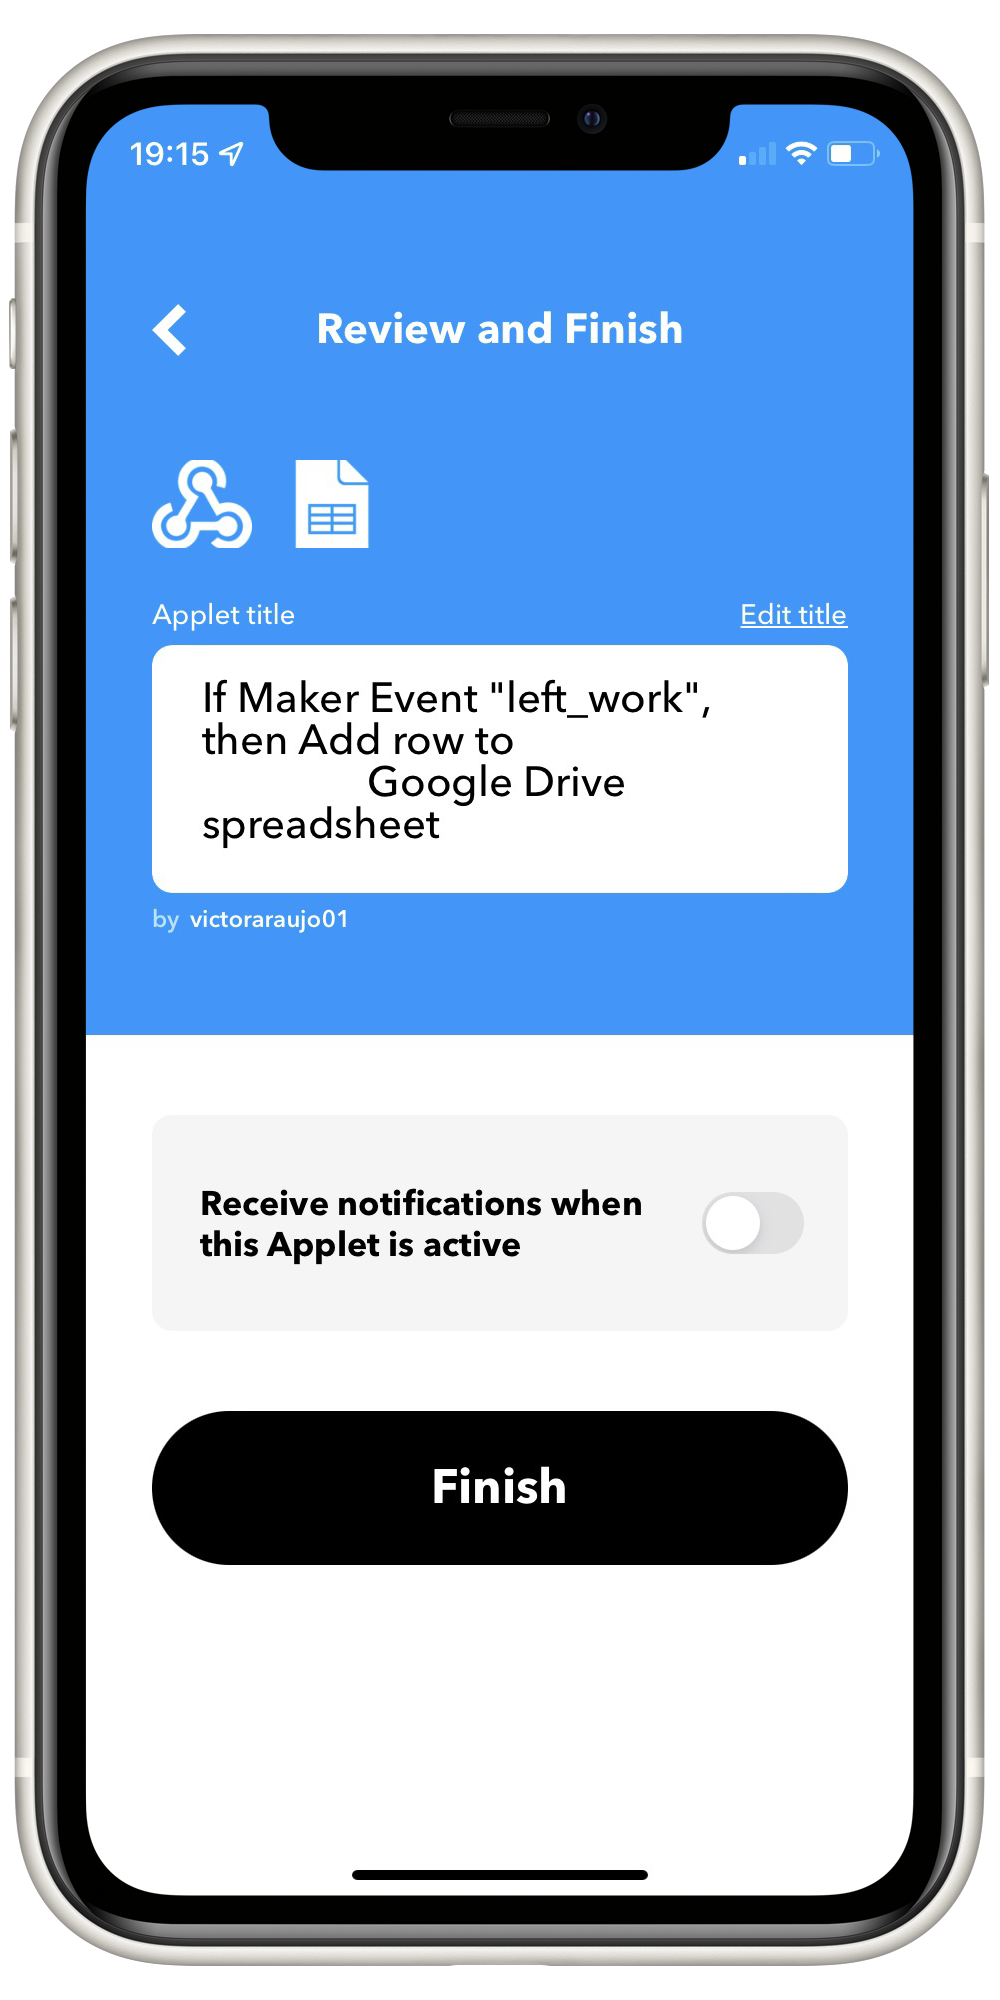
Step 9: Finish the IFTTT Applet creation
IFTTT will display a confirmation screen showing a review of the Applet you just created.
Make sure everything is OK and tap on Finish when you're done.
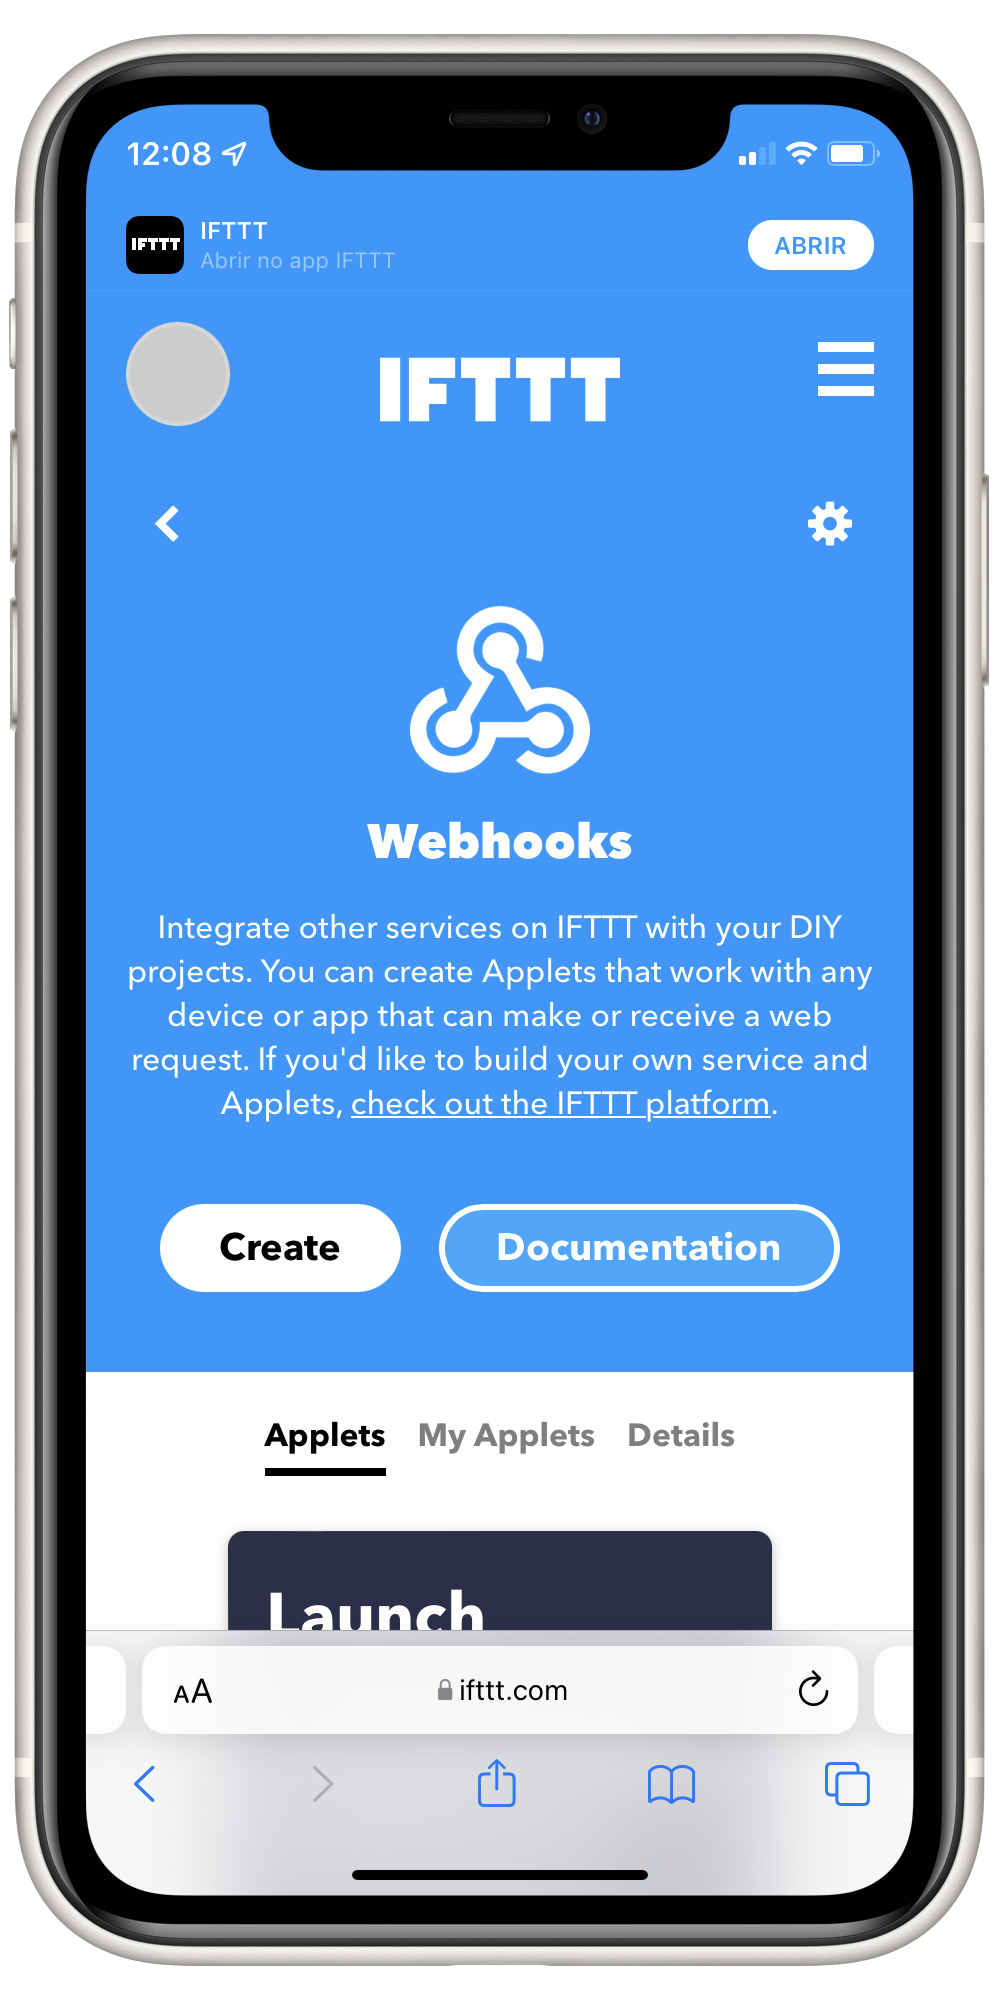
Step 10: Get the webhook URL
In order to trigger the new Applet, we have to send a request to a specific URL assigned to it by IFTTT.
To find out which URL we must use, head to the Webhooks Service page on IFTTT and tap on the Documentation button.
It will lead you to a page containing a URL with the following format https://maker.ifttt.com/trigger/{event}/with/key/randomKeyProvidedByIFTTT.
Simply replace the {event} placeholder with the name we've previously defined on Step 4 and note down this URL. We're going to need it later once we start setting up the Background Trigger.
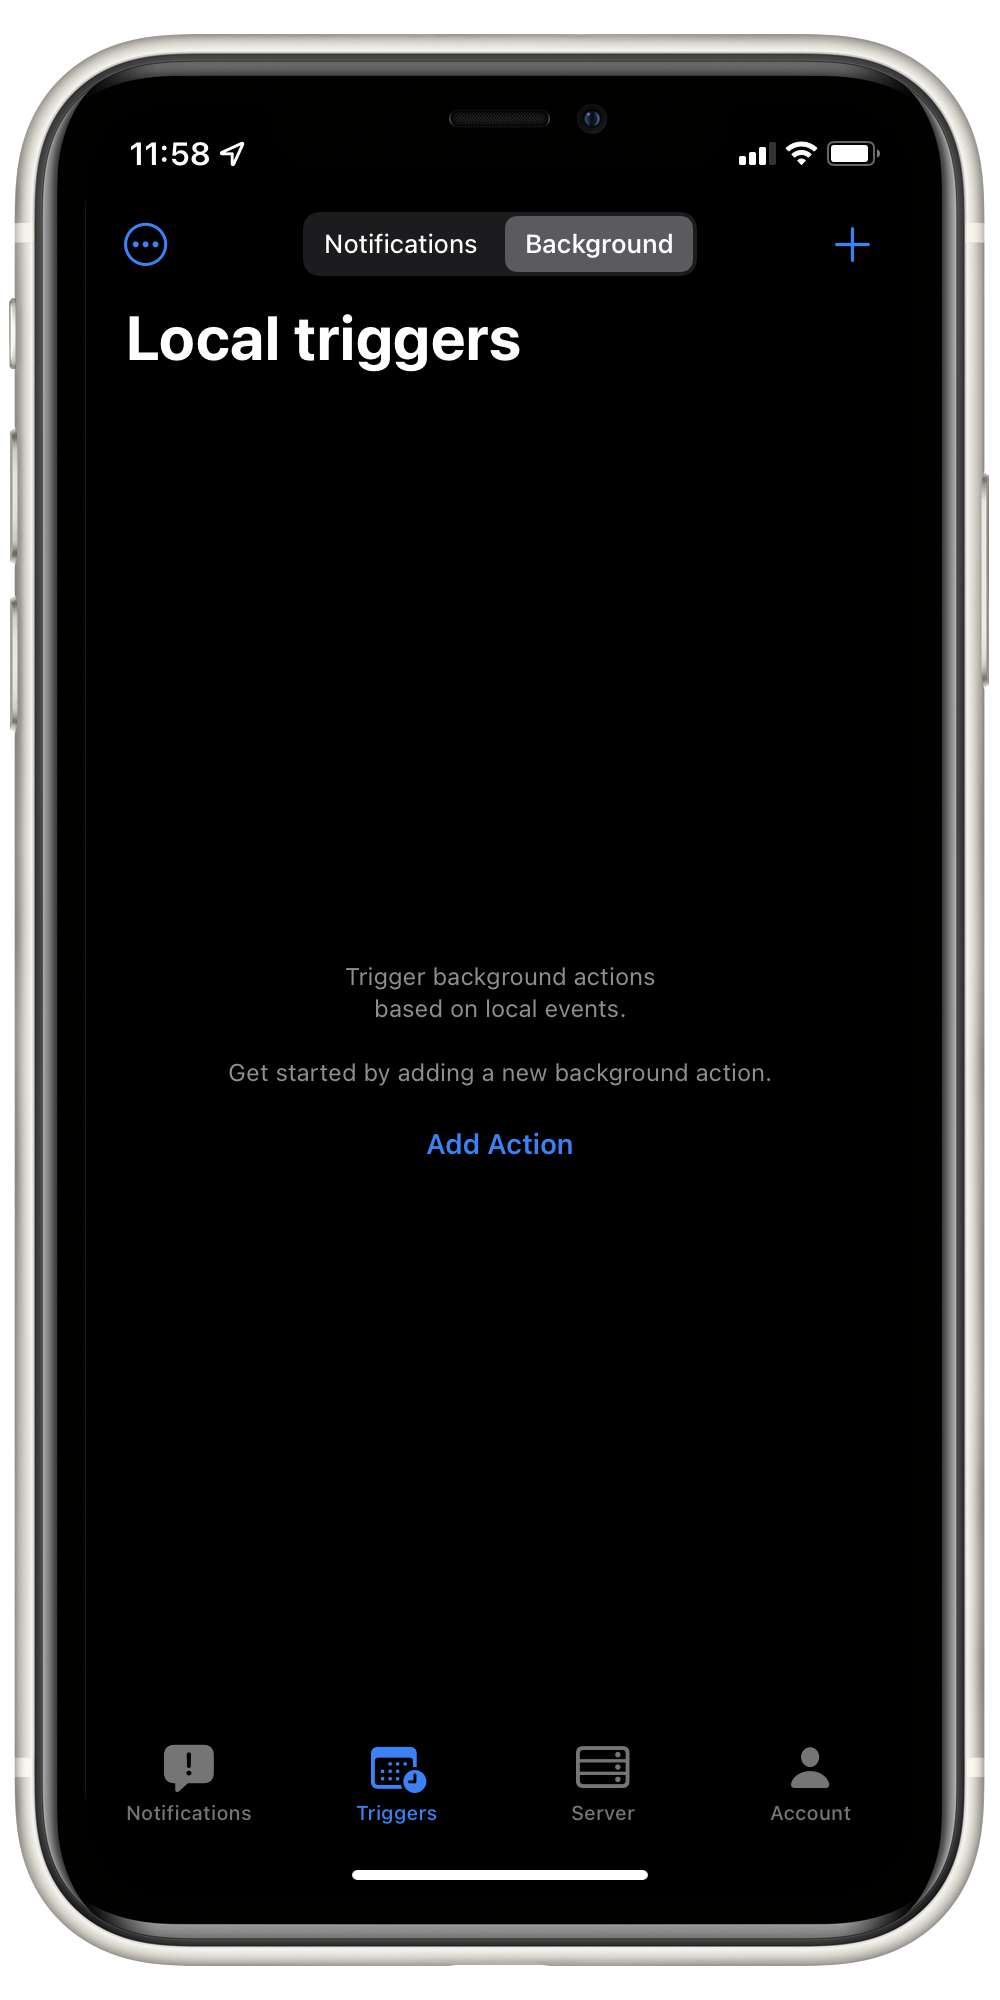
Step 11: Create a new background trigger
It's time to fire up Pushcut and start working on our Background Trigger!
On the Triggers tab, select Background and tap on the + button to create a new trigger.
Step 12: Setting up the background trigger
Now we need to set up the parameters for our Background Trigger.
As the name suggests, this type of trigger uses the geofencing resources provided by iOS and iPadOS to execute some types of action that are allowed by the operating system when the user leaves or arrives at a specific location or an area near a Beacon.
Notice that this is different than what Shortcuts can do with its built-in Automation features, since it requires user interaction before running any actions you've defined.
Tap on Background Action to start setting up our action.

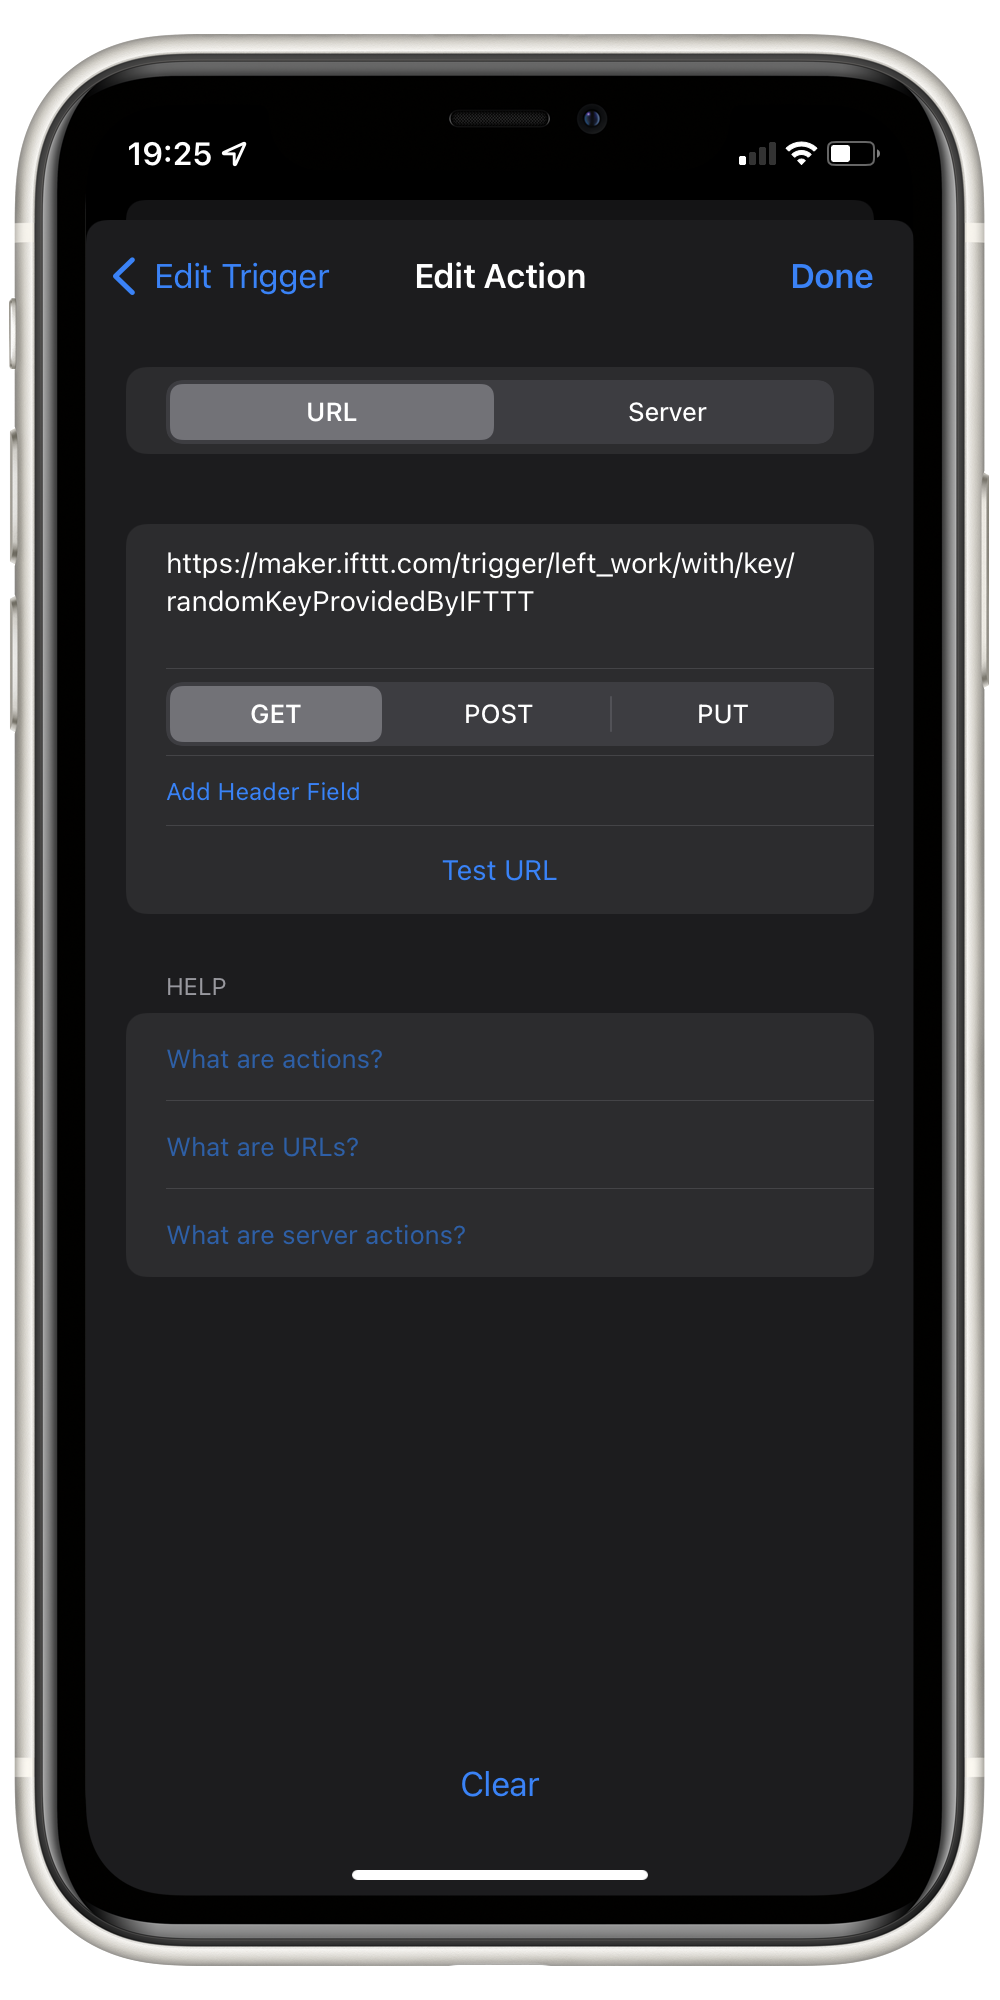
Step 13: Set up the action
It's time to link our background trigger with the IFTTT Webhook, by using the URL obtained on Step 10.
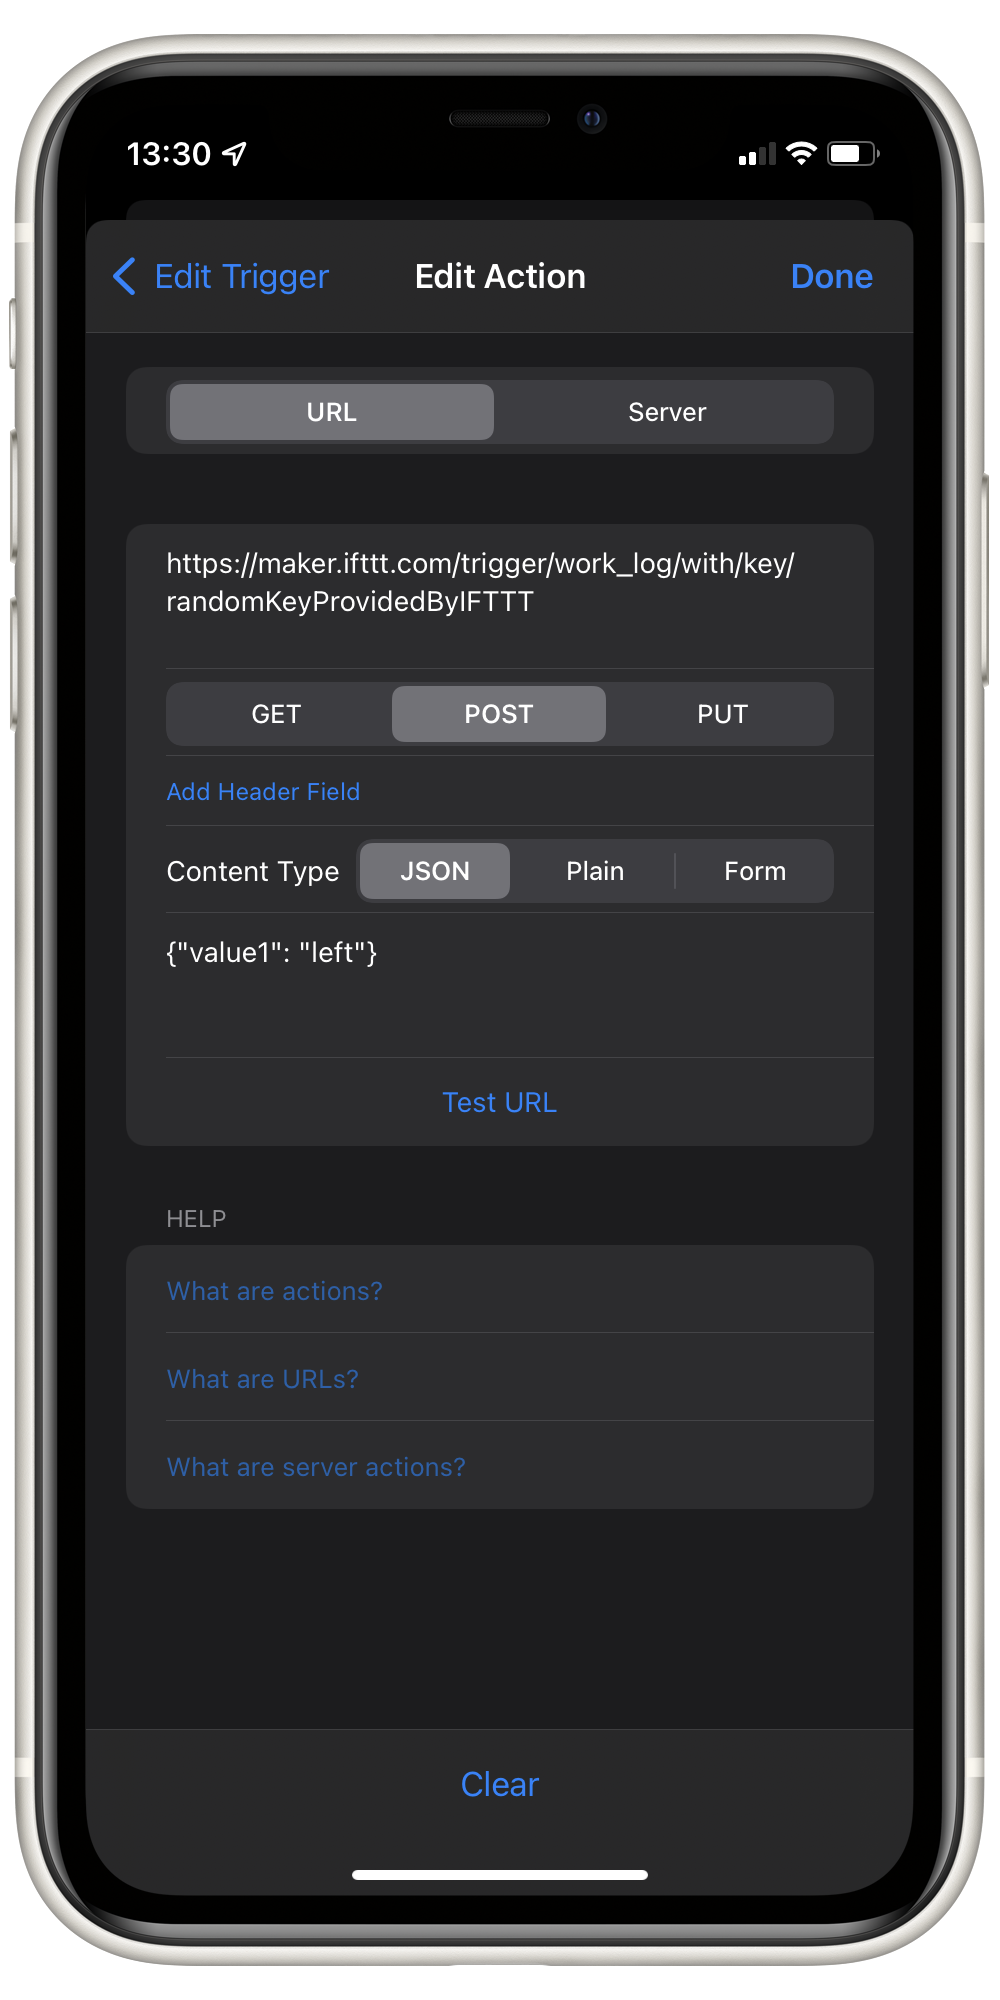
Just paste the Webhook URL on the text field and leave the default options of URL and GET selected.
Tap Done once you're finished.
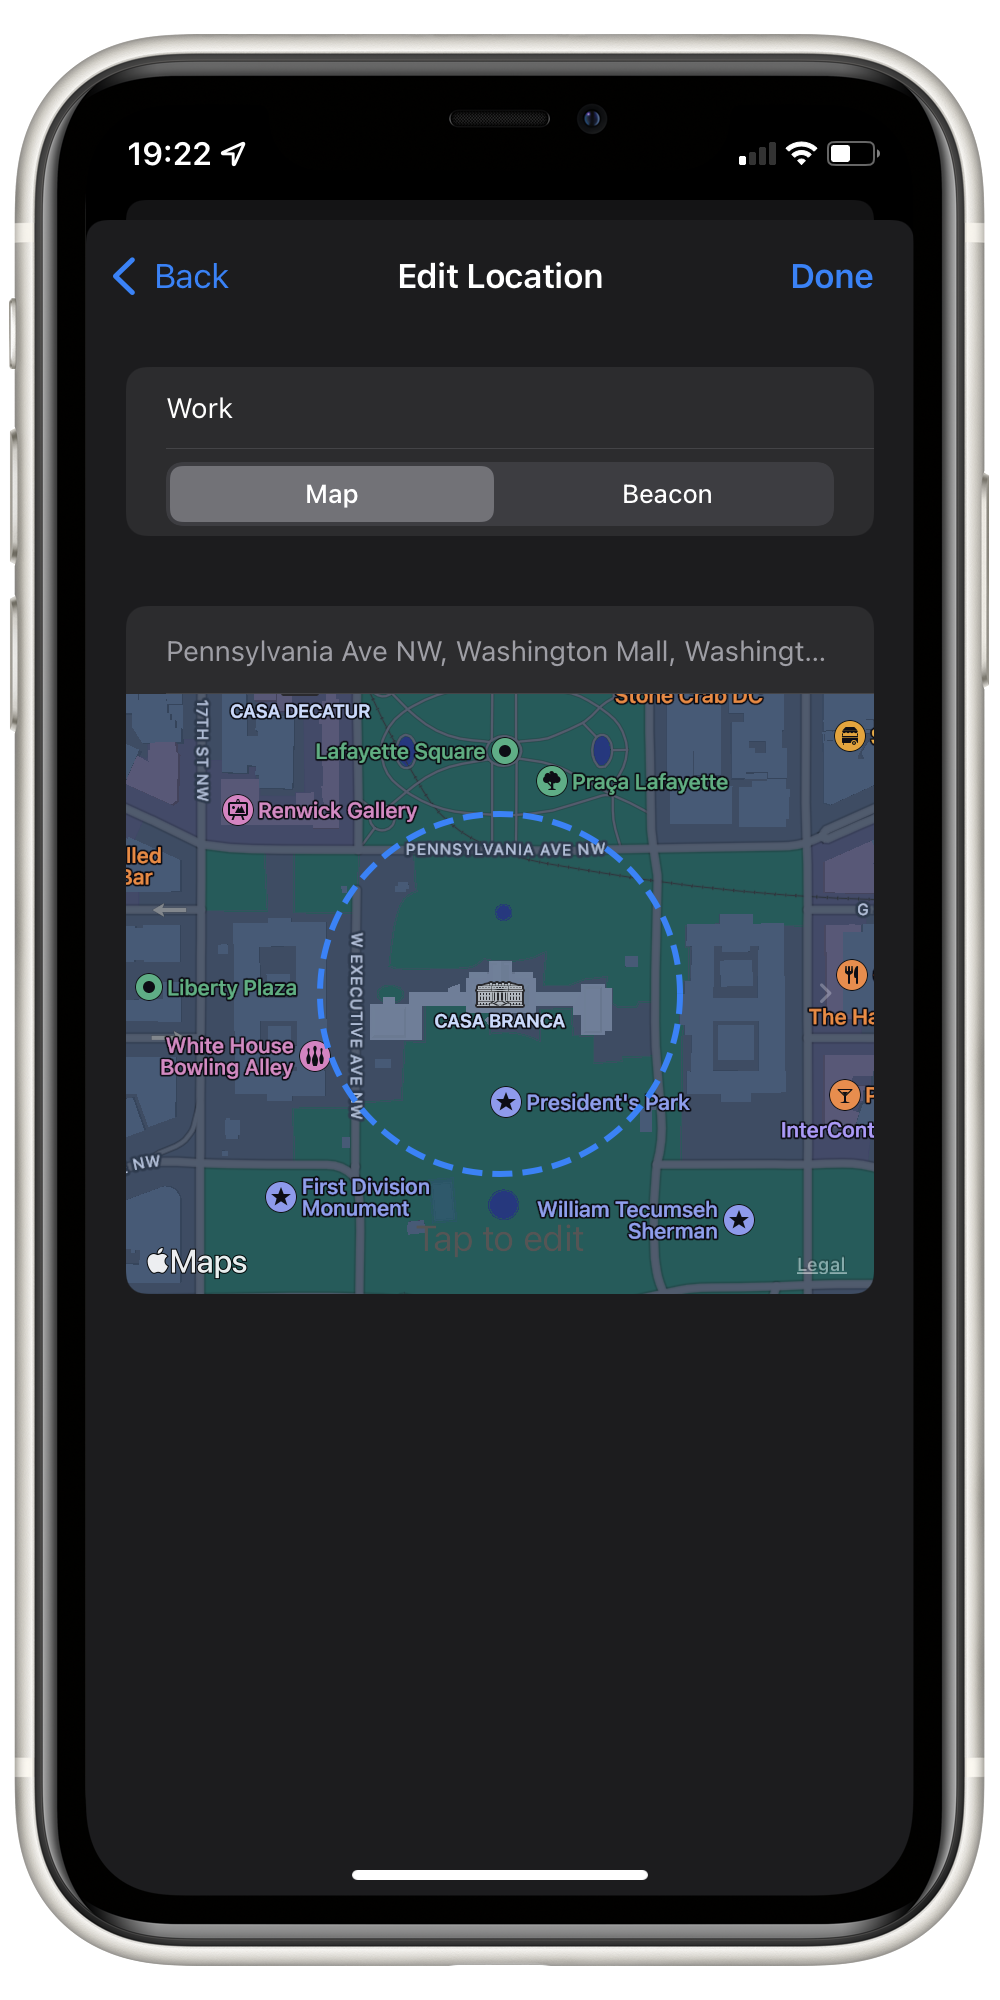
Step 14: Set up the location
Once you're back to the background trigger details screen, tap on Location to define the area that will trigger our action.
You can choose one of your previously defined locations or define a new one, as shown on this screnshot.
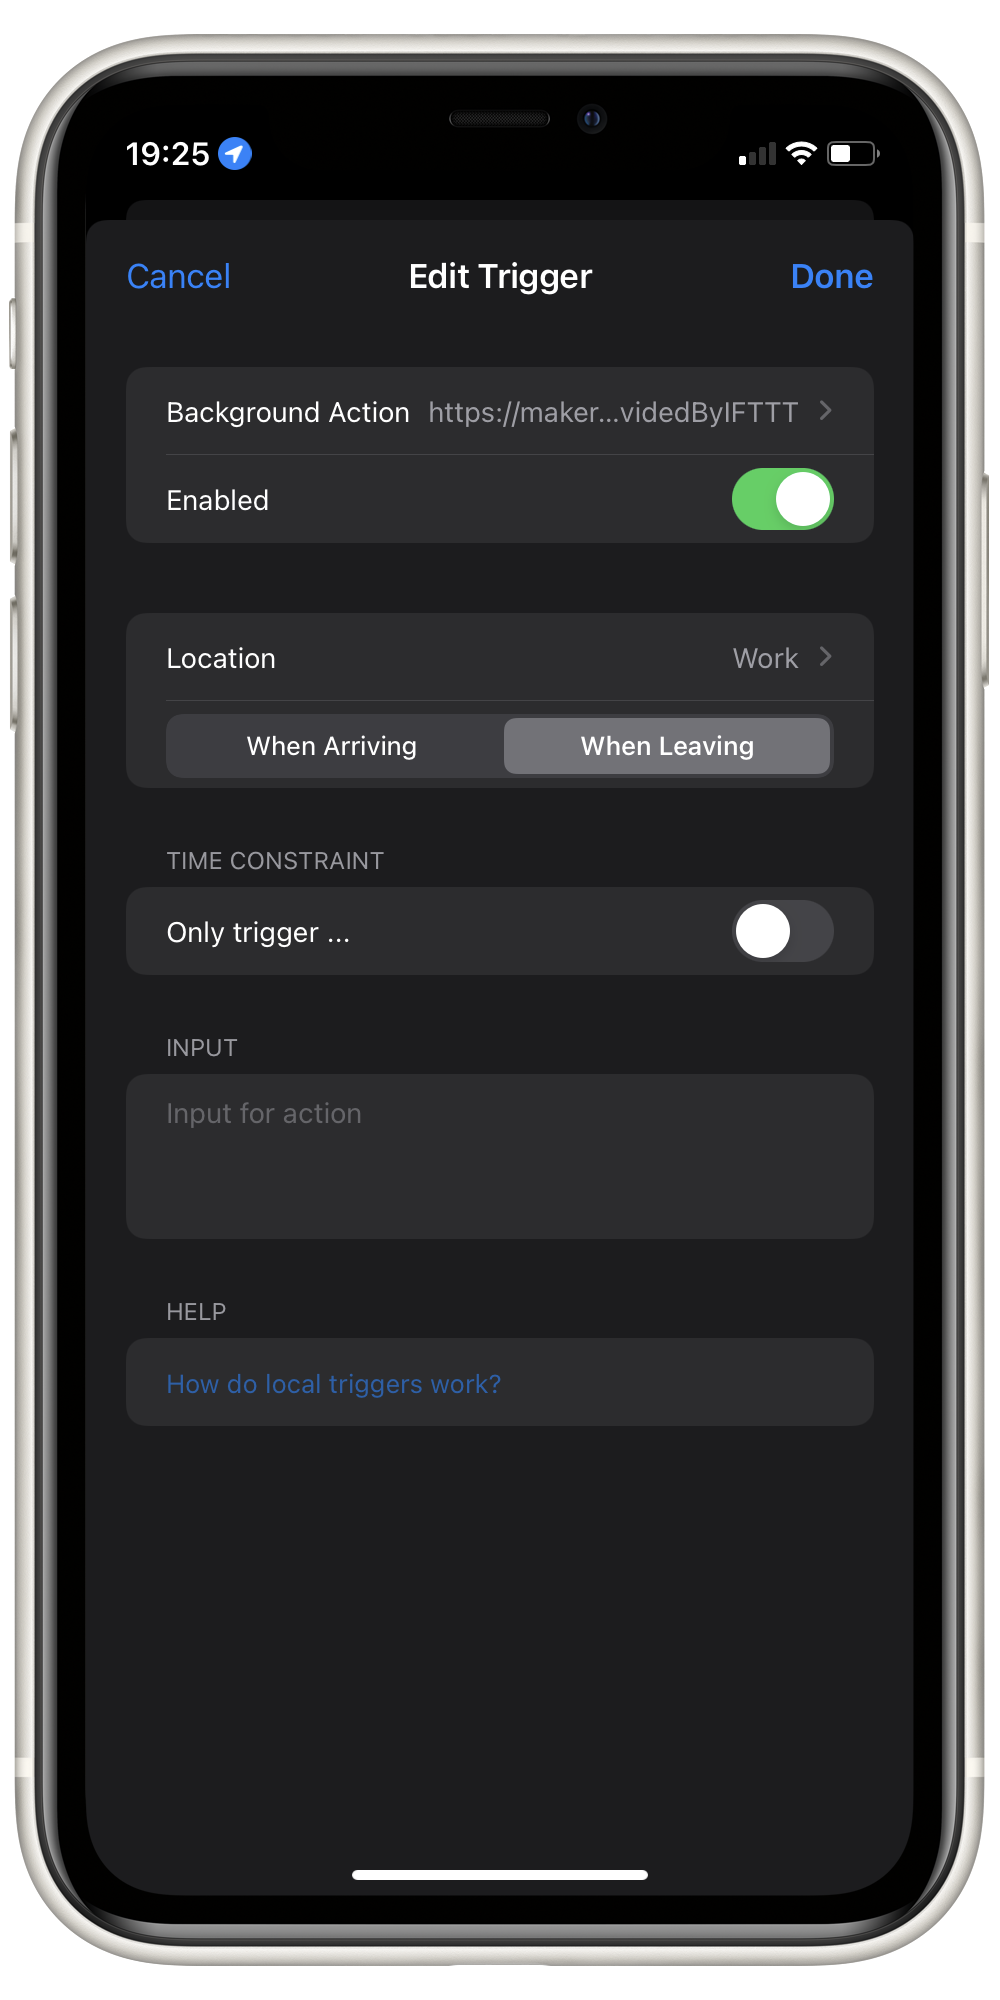
Step 15: Wrapping up!
After setting up the location, Pushcut will take you back to the background trigger details screen.
Since we're defining the trigger to leaving work, make sure to choose When leaving.
Tap Done once you're finished and now you have a fully automated log of the time you're leaving work every day!
You can now repeat this tutorial to create a similar trigger to include in your log the time of arrival.
Want more?
If you switch your URL Method to POST you can provide a JSON object to the IFTTT webhook. In our example, this feature could be used to have just one IFTTT applet to log both leaving and arriving at work.
In this case, there would be two background triggers that called the same webhook and provided the "event", such as "left" or "arrived", on the JSON object.
You can find out more about providing JSON objects to the IFTTT Webhook on the Documentation section of the Webhooks Service page.
Check out the other guides and see our Support page for more information.